Secure Checkout

Mailbox Numbers

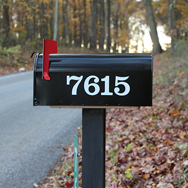
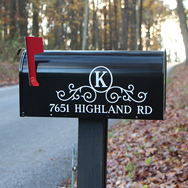
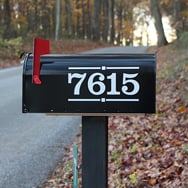
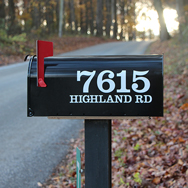
Personalize your mailbox numbers with our most popular font styles and colors. These tall home address numbers are easy to apply as decals onto a mailbox. Additionally, you can choose to have them either reflective or placed on a house number plaque.

mailbox with adhesive address numbers

What size are mailbox numbers?

Adhesive mailbox numbers can be custom sized to fit your mailbox. Typically, 4 inch address numbers are used so your house number can be viewed from 50 feet by moving traffic. You should check with your local fire department or Homeowner's Association to see what they recommend. Our number stickers can be custom cut to fit your mailbox plaque. The more numbers in the address then the wider the sticker will be. Thus, many residents will attach a smaller size for their street name.

reflective mailbox number 140 on street plaque

Do mailbox numbers need to be reflective?

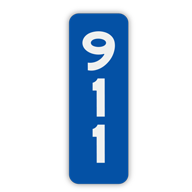
Reflective mailbox number stickers will make your street address visible at nighttime, rainy weather, or in other dimly lit areas. Our reflective house or mailbox numbers use Engineer Grade Reflective vinyl and are utilized by fire departments and EMTs nationwide. This makes it easier for emergency personnel, package delivery drivers, or pizza delivery drivers to locate your address. Our reflective mailbox numbers can be personalized in a variety of font styles and colors, unlike the black and white stickers you may find at hardware stores.

6 Products Found

The Mailbox Numbers belong in the Home & Garden > Decor > Address Signs category.

made to order
One Day
Production

Your order ships out in one business day.

guaranteed
100% Guaranteed

Lifetime Guarantee against fading, breaking, pitting or chipping.

free shipping
Fast Free
Shipping

Free shipping on vinyl letters over $25.

lettering designer
Lettering
Designer

Easy sign designer.

applying a vinyl decal with a squeegee

YOU'RE ONLY AS GOOD AS THE TOOLS YOU USE

That's why we give you the best squeegee, free with your sticky letters order. We simply weren't happy with the tiny imported squeegees. They left way too many bubbles after application. Instead, we worked with a manufacturer right here in the U.S.A. to formulate the best plastic squeegee for vinyl sign decals. Our complimentary squeegee has the perfect firmness and sway to apply your custom sticky letters from walls to wood signs. The vinyl lettering are individually cut out and are pre-spaced and pre-masked for easy all at once installation.

Learn how to Install vinyl lettering

Our Goof-Proof Guarantee - If you mess up your installation for any reason, we'll replace your decals right away for free.

~ Alphabet Signs

Mailbox Numbers FAQ's

  • Do I need to put address numbers on my mailbox?

    Mail carriers will not deliver mail to a home that does not have an address number displayed on the mailbox. Depending on the size of your mailbox surface, you can also include the street name or even your family name. If your mailbox is located on a different street from your house or apartment, it is important to put your full street address on the box.

  • What size mailbox numbers are required?

    Mailbox numbers must be a minimum of one inch tall. However, we highly recommend using 3-inch address numbers so that your house number can be easily viewed from 50 feet by moving traffic. It is advisable to check with your local fire department or Homeowner's Association to see their recommended size for mailbox numbers.

  • How to apply mailbox numbers?

    To prepare your surface, wipe it clean using an alcohol-based cleaner. Once the surface is properly prepared, position your sheet of numbers on your mailbox where you want them to be. Then, apply a strip of masking tape at the top of your custom vinyl graphic to ensure it stays in place during application. Flip over the decal and hold the bottom edge of the graphic away from the mailbox surface. Remove the wax liner to expose the sticky vinyl backing. Utilize the free squeegee included in your package to press the vinyl letters onto your mailbox, moving from top to bottom in a windshield wiper motion. Finally, remove the top layer of paper, and voila! Your address numbers are now on your mailbox.

  • How to remove mailbox numbers?

    Mix one cup of water with about 10 drops of dishwashing liquid. Spray the lettering and use a clean, sharp scraper - preferably a plastic scraper. A painter's heat gun can also help start the lettering to peel away from the surface, but keep it moving so you don't damage the mailbox surface. Hold the scraper as flat as possible to avoid gouging your mailbox surface. Once you start a corner of the old address numbers, try using your fingers to pull it off. You may need to repeat this step if the old vinyl letter tears. Then use a solvent such as Goo Gone to clean away the old adhesive. Acetone also works but be sure to clean it away quickly to avoid damage to the surface of your mailbox.

  • Where do you put the numbers on a mailbox?

    In order for your mail carrier to easily see the numbers while approaching your home, it is important to position the address numbers on the front or flag side of the mailbox. If you prefer, you can also fill the side of your mailbox with larger letters. However, please ensure that the vinyl letters do not obstruct the opening of the mailbox door. To assist you with this, we provide two sets of vinyl lettering - one for each side of your mailbox.

  • Where can I buy mailbox numbers?

    AlphabetSigns.com is a leading provider of vinyl house numbers and letters in the USA. We offer customizable mailbox numbers in a range of font styles and colors. Our address numbers are easy to apply as decals on a mailbox, and they can also be used on a house number plaque. We take pride in offering a Goof-Proof Guarantee - if you make any mistakes during installation, we will replace your number decal free of charge. Your order will be shipped out within one business day, and we provide free shipping on orders over $25.00. As an added bonus, you will receive a high-quality squeegee at no cost with your sticky letter order. We were not satisfied with the small, imported squeegees as they caused too many bubbles after application. Therefore, we collaborated with a manufacturer based in the USA to create the best plastic squeegee specifically designed for applying vinyl sign decals. Our complimentary squeegee is perfectly firm and flexible, ensuring a smooth application of your custom sticky letters to your mailbox.

  • Can mailbox numbers be reflective?

    By using reflective mailbox number stickers, your street address will be easily visible during nighttime, rainy weather, or in dimly lit areas. Our reflective house or mailbox numbers are made from Engineer Grade Reflective vinyl, which is widely used by fire departments and EMT's across the country. These reflective numbers assist emergency personnel, as well as package and pizza delivery drivers, in quickly locating your address. Unlike the generic black and white stickers that can be found at hardware stores, our reflective mailbox numbers are personalized and available in a variety of font styles and colors.

  • Can mailbox numbers include a family name?

    You can personalize your mailbox address numbers with a family name with our many mailbox design template ideas.

  • How much do mailbox numbers cost?

    You can get custom adhesive mailbox numbers starting at just $27.95 for a set of two decals - one for each side of your mailbox. The price includes shipping as well. Each decal set includes the house number in 3-inch tall letters, allowing for excellent visibility. Additionally, the street name can be included in shorter letters below the house number. You have the option to personalize the adhesive number sets with various font styles and colors to suit your preferences.

MAILBOX NUMBERS
SO SIMPLE THEY'D THOUGHT A PRO DID IT!

When homr or business owners purchase vinyl letter for their companies, many are left wondering how to properly apply the custom decal to a chosen surface. The process begins with preparing the area.

Dry Mount Method

  • 01
    cleaning surface

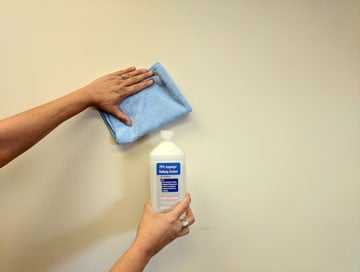
    The process starts with preparing your surface. It's important to wipe clean all application surfaces with an alcohol-based cleaner. This will rid the surface of any harmful material that may be lingering around. Additionally, the room temperature should be between 45° and 90° Fahrenheit before beginning the application process. The target site for your lettering should not be too humid, as it could negatively impact the application.

  • 02
    install step two taping decal along top

    Tape Your Decal

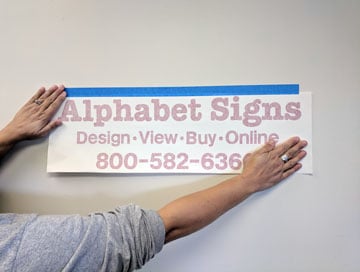
    After your surface is properly prepared, apply a strip of masking tape on the top of your custom vinyl graphic. This will ensure that it stays in place during application.

  • 03
    install step three removing wax liner

    Remove Wax Liner

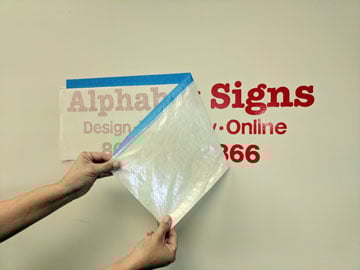
    Flip over the decal and hold the bottom edge of the graphic away from the application surface. Then expose the sticky vinyl backing by removing the wax liner.

  • 04
    install step four squeegee decal

    Squeegee the Decal

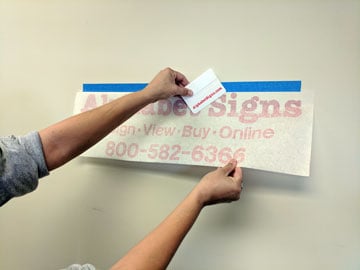
    Use the included squeegee to press the vinyl letters on the area where you want them to appear, going from top to bottom in the motion of a windshield wiper. Be careful not to trap any pockets of air under the decal. This would create unsightly bubbles.

  • 05
    install step five removing transfer tape

    Remove the Transfer Tape

    After you remove the top layer of paper, your letters will appear in place. Your new lettering will serve as a way for your customers to always have visibility of your company name, logo and/or products. It's really a great way to make a permanent mark in your community. If you have any questions about your lettering order please call our customer service tam and we will walk you through the steps.