Your Cart (0)
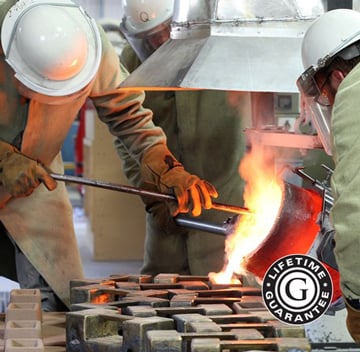
Strength, texture, image and durability. Each metal letter is precision cast in aluminum or bronze using up to twenty distinct manufacturing steps. The metal provides depth and permanence to your image. Seven metal finishes give you the choice of dazzling shine, brilliant color, or natural and antiquated metal. Combine these finishes with an extensive selection of letter styles to design signs that reflect your individual image.

The biggest difference is that cast metal letters have more depth than a flat cut out metal letter. Cast metal letters are hollow in the back so your not paying for all the material that won't be seen anyway. Cast metal letters are available in over fifty font styles and standard sizes whereas flat cut metal has unlimited options in sizes and fonts. Otherwise, both cast metal and flat cut letters have the same mineral properties and finishes selections.
Yes we can make custom logos, fonts and graphics with cast metal materials. Cast metal can come in different color selections and material finishes. Contact us with your vector based artwork to start a price quote.
We guarantee Gemini sign products for life. This means that if any exterior rated letter, logo, or plaque ever fades or breaks, we will replace it at no cost to you. Guaranteed.
~ Alphabet Signs
Watch video of how cast metal sign letters are made.
Watch video of how to install sign letters with stud mounting hardware.
Watch video of how to install sign letters onto a brick wall.
Watch video of how to use a mounting pattern for proper installation of sign letters.

The font has been carefully designed to allow a viewer's eye to easily see the shape of each character. Not each character in a font is exactly the same size; otherwise your sign lettering would be difficult to read. We name the font after its uppercase letter 'A' size but most lowercase letters are shorter. Some lowercase letter shapes such as 'b d f h k l' have ascenders which can be taller than the uppercase 'A' height. Some lowercase letters such as 'g j p q y' have descenders which go below the words baseline. Uppercase letters that are rounded such as 'C G J O Q S U' are taller than an uppercase 'A' because the rounded part extends above and below the baseline. Please call us if you need to know the character's actual size and not its named size.
This item is returnable under the following conditions:
Free returns means that we do not charge a restocking fee but we do not pay for return freight. Please call Alphabet Signs at 1-800-582-6366 for Return Authorization Number so we can properly refund your money.
Christy will take you step-by-step through the process of installing building letters. Thoroughly clean application area of all dirt, tar, and wax. Mark the decal with a ruled line along the top of letters and down its center.

Tape one edge of the template to the installation surface and unroll it. Level the template and tape the other edge of the installation surface.

Mark holes with center punch, then drill 1/4" holes 3" deep where indicated on your template. Remove the template and clean out all drill holes using any of the following methods: a quick puff of air, using the vents on your drill, compresses air or a turkey baster.

Insert the studs into the stud holes on the back of each letter. Place letters in holes on wall before applying silicone to verify position. Adjust as necessary. Now fill the drill holes in the wall of the first letter with silicone.

Push the tube of silicone over each stud on the first letter in order to evenly coat it with adhesive.

Push the letter into the drill holes using a shim or spacer to assure proper stand off of the letter from the wall. Repeat steps 2 through 4 for the rest of the letters.

Clean the installation surface firs. Position the spacing tape on the wall and secure one end with masking tape. Unroll, level and tape the other end. Spacing tapes show the general position of each letter.

Apply silicone to all the pads on the letter first. Position the letter on the wall where indicated with the spacing tape. Tape the letter to the wall with several strips of masking tape.

Adjust as needed, push letter against wall to ensure good adhesive bond. Continue with the remainder of the letters, and allow the silicone to cure before removing the masking tape. Temperature and humidity will influence silicone cure times. On some conditions letters should cure overnight.