Flat Cut Brass Letter Sign Designer

Product Description

Brass letters and numbers for signs are custom made in a variety of sizes, typestyles and finishes. The brass lettering cut outs are used for indoor conference rooms, in a hotel or restaurant lobby, or on a decorative office wall.

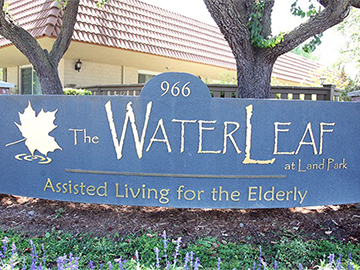
Brass metal sign letters are also used outdoors for building names, company logos, or on signs at entrances to developments and apartments. Brass Alloy C46400 is a superior metal for outdoor signage because of its strength and hardness against weather extremes particularly in marine areas.

Brass Alloy C46400 sign material is mainly copper with zinc added to give it its hardness, warm look and color. The brass Alloy C46600 is lead free and is considered navy brass.

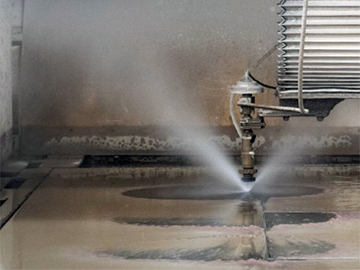
The manufacturing of brass letters and numbers are custom cut from a flat sheet and is placed on a table where a computer driven waterjet cuts each letter to precision.

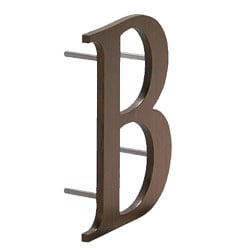
Once your brass lettering has been waterjet cut, it is prepared for finishing. The cut out brass letters and numbers are turned over, and stud pin mounting hardware is attached that will be used for your installation.

During the finishing process, the brass cut letters are held by its studs and is bead-blasted to make each brass letter precise and smooth, then stroke sanded to give it a natural satin finish.

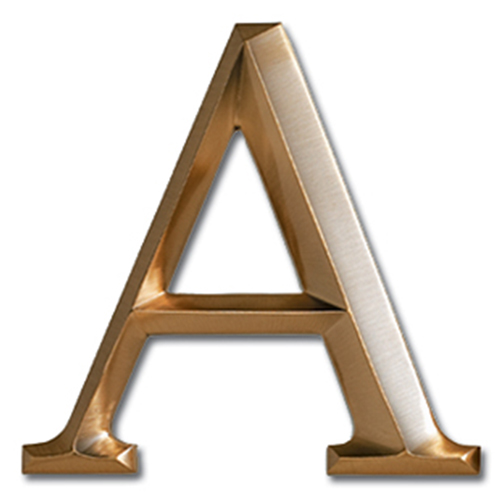
The brass letters and numbers, can be polished, antique brass or natural satin brass finish. Brass sign letters will naturally oxidize over time that provides it with a vintage or antique appearance. The oxidizing can be chemically advanced with an oil rubbed black patina. The natural satin brass finish and the polished brass finish are the most popular, especially for home address signs or metal initials. All brass letters may vary slightly from order to order.

The brass sign letters are set up on a rack where it is coated with a two-part hardened acrylic polyurethane clear-coat, then sent to an oven for baking.

These brass letters and numbers come with a lifetime warrantee against fading, cracking, pitting or chipping and are easy to install.

Updated: 2025-09-16
flat cut metal brass letters

What are the benefits of metal sign letters?

Strength, texture, image and durability. The impression is classic and elegant. The material is versatile and durable. Nothing strengthens your public image more than an attractive metal sign letter, custom made, produced to order, by craftsmen committed to your satisfaction.

how flat cut out metal letters are produced

How are cut out metal sign letters produced?

Precision cut with high pressure water jet and laser. The metal comes in a flat sheet and is placed on a table where a computer driven waterjet cuts each letter to precision. Waterjet cut letters are made using a fine, high pressure stream of water that carries an abrasive mineral. This fine stream cuts and allows for sharp, precise corners and intricate detail on small letters and characters.

custom brass metal lettes numbers

What colors and type of finishes do metal sign letters have?

In the finishing process, the letter is bead-blasted to make the surface smooth then stroke sanded to give it a natural satin finish. The letters can be left with a natural satin finish, painted, or dipped in a bath for surface pigmentation. All metal letters are coated with a two-part hardened acrylic polyurethane clear-coat, then sent to an oven for baking.

flat cut metal letters

Can you make custom logos and fonts with metal sign letters?

Yes we can make custom logos and graphics with flat cut out metal materials. Contact us with your vector based artwork to start a price quote.

We guarantee Gemini sign products for life. This means that if any exterior rated letter, logo, or plaque ever fades or breaks, we will replace it at no cost to you. Guaranteed.

~ Alphabet Signs

Related Videos

Time 2:23 minutes

Watch video of how to install sign letters with stud mounting hardware.

Time 1:52 minutes

Watch video of how to install sign letters onto a brick wall.

Time 1:12 minutes

Watch video of how to use a mounting pattern for proper spacing and installation of sign letters.

UPPERCASE VERSUS LOWERCASE LETTERS

typography alphabet

The font has been carefully designed to allow a viewer's eye to easily see the shape of each character. Not each character in a font is exactly the same size; otherwise your sign lettering would be difficult to read. We name the font after its uppercase letter 'A' size but most lowercase letters are shorter. Some lowercase letter shapes such as 'b d f h k l' have ascenders which can be taller than the uppercase 'A' height. Some lowercase letters such as 'g j p q y' have descenders which go below the words baseline. Uppercase letters that are rounded such as 'C G J O Q S U' are taller than an uppercase 'A' because the rounded part extends above and below the baseline. Please call us if you need to know the character's actual size and not its named size.

Customers Also Bought These Items

Aluminum Sign Letters & Numbers

Bronze Letters & Numbers for Signs

Cast Aluminum Sign Letters & Numbers

Minnesota Molded Sign Letters

Product Shipping Policy

This item ships UPS Ground to the continental US and once shipped, normally takes 2-5 business days to arrive in transit. UPS is one of the largest shipment and logistics companies in the world. UPS delivers more than 15 million packages a day to more than 6.1 million customers with exceptional real time tracking and notifications.

dimensional weight

UPS offers the best value for medium size packages. UPS has been moving towards a dimensional weight pricing model where the shipping charges are calculated on the package weight, package dimensions and area delivered. The UPS shipping cost is calculated at check-out and adds to the cost of the order.

Shipping to AK and HI needs to be quoted and we will email you an invoice for the total cost before the order is processed. We are not set up for international shipments. We do not ship COD or bill to third parties.

All claims for damage must be made within 3 business days.

Product Return Policy

This item is returnable under the following conditions:

  • A Return Authorization Number is placed on the outside of the package.
  • Return to the shipper within 30 days of receipt of the package.
  • Return in original container and in salable condition, must not have been used.
  • No restocking fee is charged
  • Shipping fees are non-refundable.

Free returns means that we do not charge a restocking fee but we do not pay for return freight. Please call Alphabet Signs at 1-800-582-6366 for Return Authorization Number so we can properly refund your money.

INSTALLATION OF BUILDING SIGN LETTERS
SO SIMPLE THEY'D THOUGHT A PRO DID IT!

Christy will take you step-by-step through the process of installing building letters. Thoroughly clean application area of all dirt, tar, and wax. Mark the decal with a ruled line along the top of letters and down its center.

Stud Mount Method

  • 01
    install step one

    Tape one edge of the template to the installation surface and unroll it. Level the template and tape the other edge of the installation surface.

  • 02
    install step two

    Mark holes with center punch, then drill 1/4" holes 3" deep where indicated on your template. Remove the template and clean out all drill holes using any of the following methods: a quick puff of air, using the vents on your drill, compresses air or a turkey baster.

  • 03
    install step three

    Insert the studs into the stud holes on the back of each letter. Place letters in holes on wall before applying silicone to verify position. Adjust as necessary. Now fill the drill holes in the wall of the first letter with silicone.

  • 04
    install step

    Push the tube of silicone over each stud on the first letter in order to evenly coat it with adhesive.

  • 05
    install step five

    Push the letter into the drill holes using a shim or spacer to assure proper stand off of the letter from the wall. Repeat steps 2 through 4 for the rest of the letters.

Pad Mount Method

  • 01
    install step one

    Clean the installation surface firs. Position the spacing tape on the wall and secure one end with masking tape. Unroll, level and tape the other end. Spacing tapes show the general position of each letter.

  • 02
    install step two

    Apply silicone to all the pads on the letter first. Position the letter on the wall where indicated with the spacing tape. Tape the letter to the wall with several strips of masking tape.

  • 03
    install step three

    Adjust as needed, push letter against wall to ensure good adhesive bond. Continue with the remainder of the letters, and allow the silicone to cure before removing the masking tape. Temperature and humidity will influence silicone cure times. On some conditions letters should cure overnight.